A lot of people assume that making GIFs is hard. Of course, those people would be wrong.

Here’s what you need to make GIFs: A video, and a one of two tools to turn that video into a GIF.
I use a tool called Snapz Pro X to record videos directly off my screen — a livestream on ESPN, a quick clip from a TV show — and save them to my computer. It costs $69, but it’s one of my most used tools. (It’s also Mac only, FWIW.)
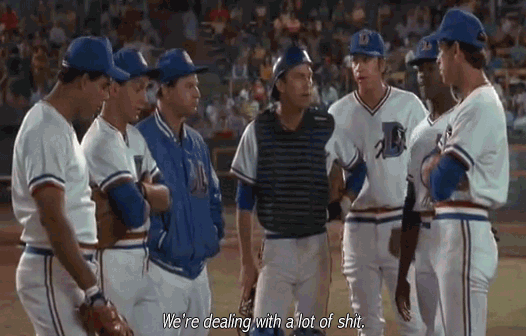
So let’s start from the beginning. Let’s say I’m watching “Bull Durham,” and I want to make a GIF of the famous Kevin Costner scene on the mound. So I’ll open up Snapz, hit the movie button and record the short clip I need. Then I’ll save it to my computer.
From there, you’ve got two options.
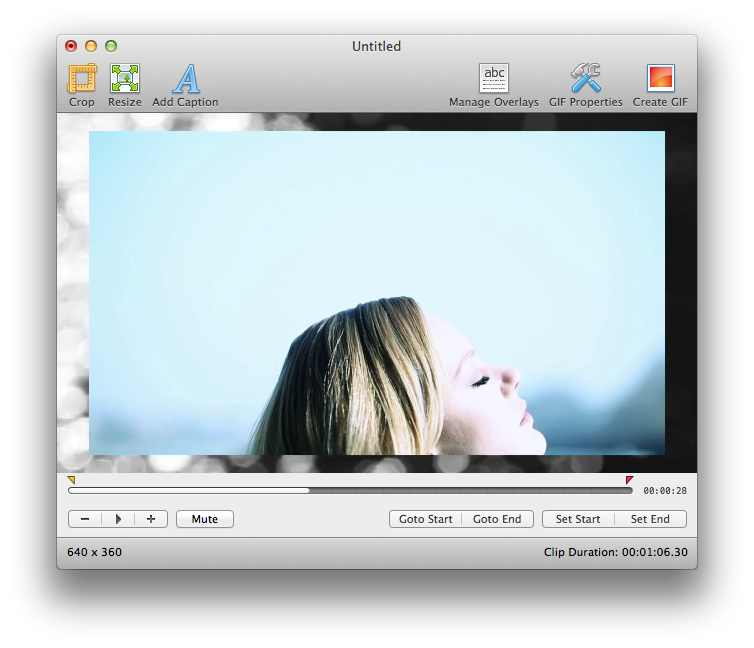
The first is the simple one: Download GIF Brewery, a Mac app. In the app, you select your start and end points on the video, add a caption if you want, and then hit “Create GIF.” You can even crop or resize the GIF if needed. It’s really simple, and it works well. The app costs $4.99.
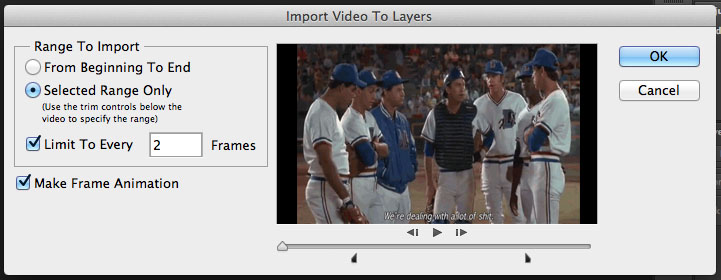
 The slightly more professional option is to use Photoshop. In Photoshop, click File—>Import—>Video Frames To Layers. Select the video you want to turn into a GIF. Adjust the start and end points using the sliders underneath the video, and click “Selected Range Only.” If it’s a really big file, limit it to every 2-3 frames, and make sure “Make Frame Animation” is selected.
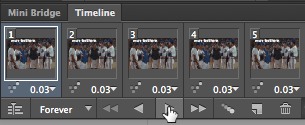
That’ll open up the animated file. Go to Window—>Timeline. A scroll will pop up on the bottom of your screen with every frame that Photoshop has pulled from the video. Hit the play button at the bottom.
And you’re halfway there.
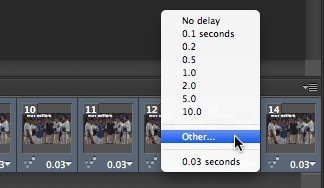
The rest is playing with the speed of the video. If you want to make the video go slower, hit the triangular button at the right corner of the Timeline window, and click select all frames.
Then hit the triangle next to the number 0.03 — it’s there below each frame of the GIF — and hit Other. If you want a GIF to run at about normal speed, set the delay at 0.08. If you want it slower, go for 0.12. If you want to go really slow, 0.16 is your best bet.
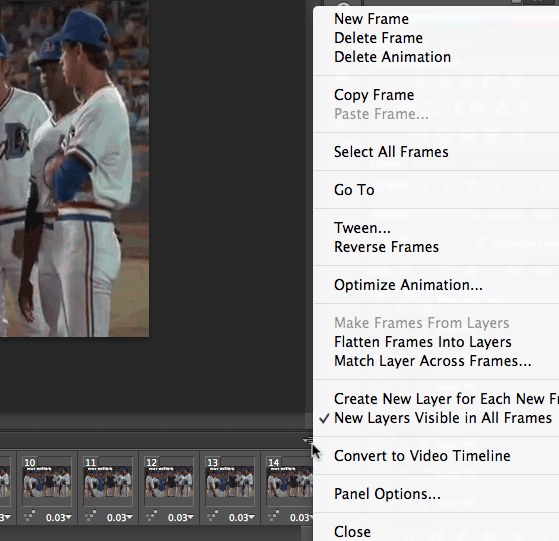
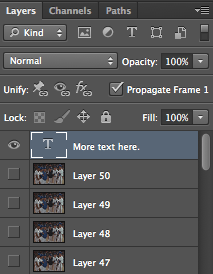
If you’d like to add text, the key is adding a frame at the top of your layers. Pop in your text where you want it. Then go back to the triangle at the right of the Timeline window, and click “Match Layer Across Frames.” That’ll set it in the right place for each frame of the GIF.
If you need to adjust the color or brightness of the images, you can do that here, too, just like you’d do for any other image. (Go to Image–>Adjustments.)
The final step: Go to File—>Save For Web. If the file is really big — you can see the file size in the bottom left corner of the window, and anything bigger than 3MB is pretty big for a GIF — then decrease the dither a little. If you need to shrink it more, increase the lossy. Both will make the GIF a little less sharp, but nothing too bad. Preview the image to make sure it’s running at the correct speed, and then click save.
And you’ll end up with something like this:
The other GIF secret is that if you just want to modify an existing GIF in Photoshop, that’s easy, too. Save it to your computer, and import it the exact same way you imported the video clip. The frames will show up in the timeline window, and you can modify it from there.
It takes a little time getting used to, but once you get the hang of making GIFs, it’s actually a really fun tool to have. If you try to make a GIF and get stuck, just shoot me an email, and I’ll see if I can help you troubleshoot.
Now get out there and tell some great stories today!