First up: Jessica L. in Philadelphia had a question about Pixlr. It’s a free web application for editing photos, and it’s designed to mimic Photoshop. So much so that I wanted to share a few simple, powerful editing tricks that work in both Pixlr AND Photoshop.
But first, I want to mention: Pixlr also has a really good mobile app, and it’s free. Most of the tools available in the web-based version are also available on mobile. You can crop, adjust the color of an image, remove red eye, or even add text to an image. The app is called Pixlr Express it’s available for iOS or Android here.
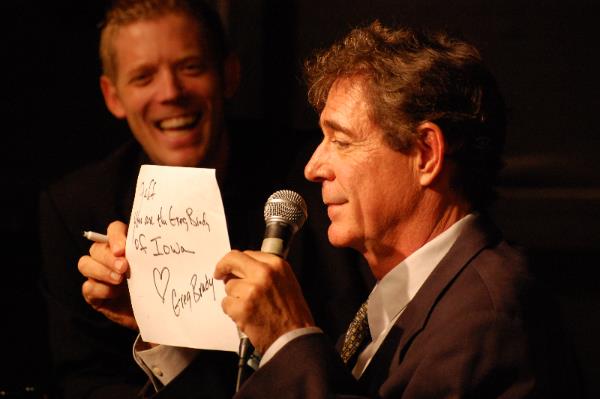
(Oh, and one more thing! For the sake of this exercise, I’ve randomly chosen to edit a photo I took last year of the actor who used to play Greg Brady. TL;DR He was doing a show in Branson, and I was in the area.)
Adjust The Brightness and Color of an Image
To get there:
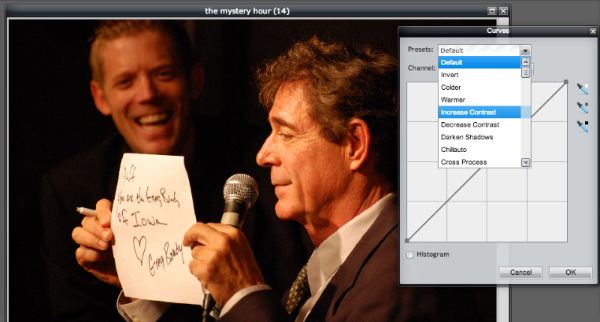
In Photoshop, go to Layer >New Adjustment Layer >Curves
In Pixlr: Adjustment >Curves
Most people use the “Brightness” or the “Contrast” buttons for this kind of task, but “Curves” is more accurate. It’ll give you a few options. Both Photoshop and Pixlr offer “Preset” templates to adjust an image. Or if one of those doesn’t work, you can always just click on that gray line and drag it up and down to adjust the contrast.
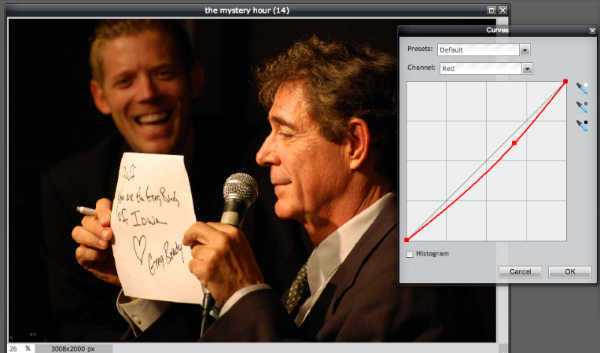
Or a third thing: In that photo, you’ll notice that the lights in that studio are adding a lot of red/orange on the actors’ faces. So you can manipulate just the individual colors by clicking on the dropdown next to “Channel,” then selecting the color in this case, red and then adjusting the line until the editor removes some of the excess red from the photo.
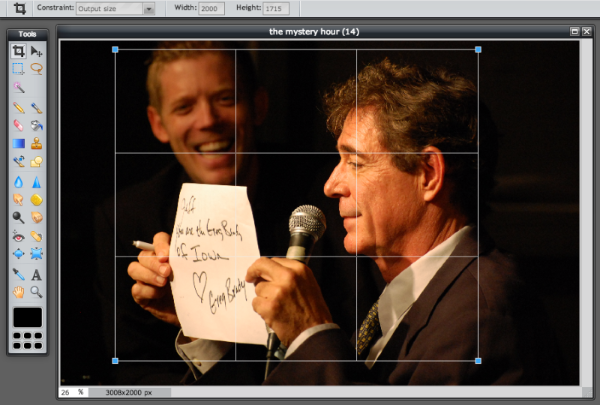
Crop An Image Down To The Right Size
To get there:
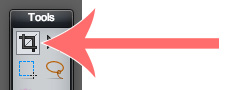
Look for the crop tool it looks like this in both Photoshop and Pixlr.
In Pixlr: Look in the top left corner for the dropdown titled “Constraint.” Next to it, you can enter an Aspect Ratio like 4×3 or 16×9 or an Output Size the fixed number of pixels you want, like 2000 x 1715. Then drag a box over your image to create the edges that you want to crop along. Adjust the box using the little blue squares on the corners. Then click “Enter.”
Or, in Photoshop: Look in the top left corner for the dropdown titled “Unconstrained.” If you’d like to crop the image into a specific ratio, enter the ratio in the boxes. Then use the crop tool to draw the image borders you want, and click “Enter.”
If you want to crop to a specific size, hit the dropdown, go to “Size & Resolution,” and enter the image size, and Photoshop will create the correct crop box for you. Then click “Enter.”
Add Text Over Your Image
Look for the big text tool on the toolbar Pixlr’s looks like a big “A,” and Photoshop has a big “T.” Click it. Then drag a rectangle where you want your text box to go.
Pixlr will pop up with a simple box to allow you to enter text and change fonts, font size, and font color.
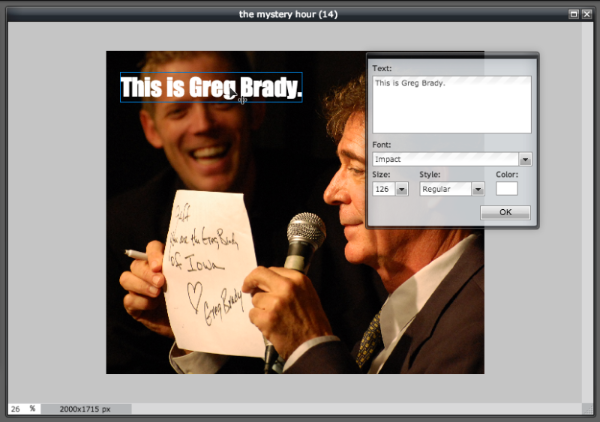
In Photoshop, the text editing options are at the top of the screen, or you can hit Command-T (on Macs, or Control-T on Windows) to pop up more text options.
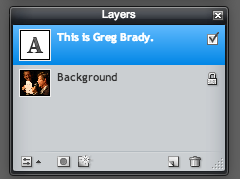
If you don’t like your text, that’s okay. Look on the right side of the screen for a box marked “Layers.” Click on the layer you want, and then either hide it (by clicking the checkbox in Pixlr, or the eye in Photoshop), or delete it by clicking the trash icon while your layer is highlighted.
Anyway, that was a lot but, if you’ve got questions, just email me, and I’ll be happy to help!
And if you want to play more with the Pixlr advanced editor, you can start right here it’s free!
Now get out there and tell some great stories today!